8.5 X 11 Scrapbook Sketches

Today, as another installment of our Canon USA collaboration, I want to share the entire process for hunting down, printing out and scrapbooking our memories from our first year of marriage. I made a scrapbook of a whole year of life (a busy one!) in just a couple of weeks. What's funny is that even though I've scrapbooked a LOT in the past, after taking a break for many years I felt like a beginner again. Everything was new to me from my goals to my priorities and even the look and feel I want from my albums. If you're new to scrapbooking I hope this simple guide will help you navigate the waters and create the kick start that you need!
Step 1: Discover Your Goals
My two goals for my scrapbooks are simple. First, I want to enjoy the process because no matter how fast you do it, it IS time consuming. It should be fun! If I didn't love all of the papers and stickers I would just make photo albums. My second goal is that I want to complete albums. I realized recently that it's not as fun for me if I just make random pages once in a while. I don't have to scrapbook every single photo, but I want to have scrapbooks for each year of our family's life. I want these albums to include all the important milestones and all of our treasured family photos. I also discovered that it's my preference that our photos are heavily dominated by photos and a little lighter on embellishments.
Your goals and priorities may be different from mine. Before you begin try to define what you want out of the experience. This is also a good time to decide what you want your first album to include.
Step 2: Choose An Album Size
The second thing I had to do to prepare was finally commit to an album size. In years past I've tried 12×12, 8.5×11, 8×8 and various sizes of mini albums. 12×12 is the easiest because it's standard so it has the biggest variety of supplies available.
After probably a little too much obsessing I chose 8.5×11. I made this choice for two reasons. First because in the past two years we've worked on two books, the first with a square format and the second with a vertical format. I enjoyed the vertical format far more because I love full bleed photos and I hate cropping them into squares. The second reason might make me sound a little cuckoo because it's so silly, but it really matters to me. I want my albums to fit on our bookshelf, with all the other books, and to not hang off the edge. So 8.5×11 is what I went with. It was a little more challenging to find the supplies and I had to do a little customizing, but it was worth it in the end!
Which album size do you like most? They all have advantages! 12×12 is the biggest and has the most supplies available in stores. 8.5×11 is awesome because you can print your vertical images full bleed without cropping off much at all. 8×8 is great because it's smaller, faster and you can print full page photos without owning a wide format printer. Mini albums are fun because you can have a lot of variety as you get to start a new book for basically every occasion. It's all good- so choose whichever you feel most comfortable with!

Now that you know what kind of book you'll be making, both content and size, you can start planning your layouts. For my first book I wanted to keep it ultra simple focusing on large photos and solutions to mix our instagram photos with our DLSR photos.
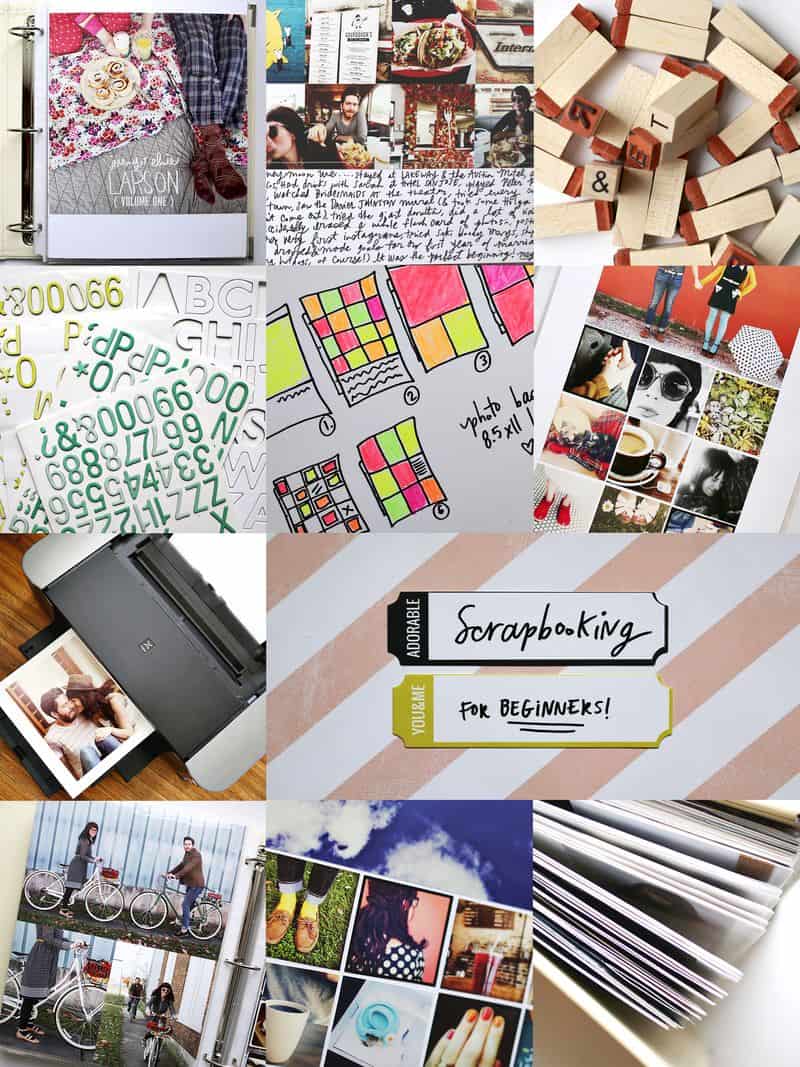
Above I've sketched out the six most common layouts I used over and over while creating our album. 1-4 are layouts where I was able to print single photos (and collages) perfectly to size so all I had to do was cut them out, adhere them to a sheet of white cardstock and add a few stickers or a handwritten memory. Layout 5 is a fun solution I came up with for mixing in my instagram photos. I use page protectors filled with tiny 2×2 squares (meant for coin collections) to store printed instagram photos and small bits of paper. Layout six is a pocket page that fits my album.
Something to note when you look at my sketches is that every spot where there is color is a spot for a photo. It's mostly photos! I love this look, but I also love that I was able to squeeeeeeze a year of photos into one album. I didn't even know that was possible!
Take some time to sketch out basic layouts that suit your album size, photos and leave as little or as much room to journal and embellish as you like!

I spent about 24 hours resizing photos in Photoshop, making collages and printing them out onto 13×19-inch photo paper. The Canon PRO-100 was of course great for the quality and rich contrast, but it also made it super easy for my bigger prints. I got CRAZY obsessed. After the first two hours you couldn't separate me from that printer. I actually carried it up (and it's heavy!) to my bedroom, so I could print while we watched our nighttime television shows. It was fun to end up with a giant stack of prints.


This step was surprisingly simple. I trimmed my photos, adhered them to white cardstock and slipped them into pocket pages. I wrote a little journaling on most pages, but only wrote out a long story a couple times in the book.
Here are a few of my favorite pages:


Here's what I learned:
I learned that scrapbooks can be mostly photos, and I love that. I learned that it is possible to make a meaningful album packed with a years worth of memories in just a few weeks. I learned that I can make time for this and it doesn't have to be hard or stressful. Most importantly, this project inspired me to take more photos of our family of two!
Until next time! Elsie
Credits // Author and Photography: Elsie Larson
Source: https://abeautifulmess.com/scrapbooking-for-beginners-our-family-volume-1/
Belum ada Komentar untuk "8.5 X 11 Scrapbook Sketches"
Posting Komentar