How to Make a Origami Sleigh
Supplies Needed
- Small box
- A4 or Letter size cardstock
- Drinking straws
- String
- Crayons or colored pencils
- Scissors
- White glue
- Acrylic paint
- Paint brush
- Hole punch
- Glue gun (optional)
STEPS
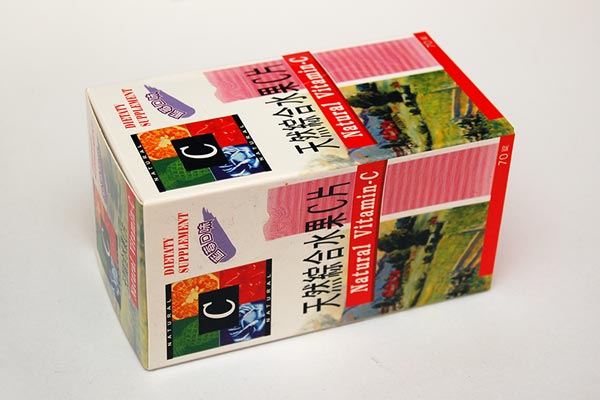
1Find a box.
Find a small or medium-sized block-shaped box to make into a sleigh.
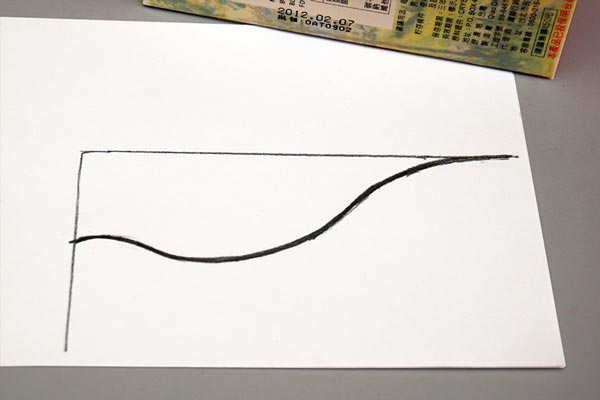
2Make a sleigh pattern.
Place the box on a sheet of paper. The largest box panel must be at the bottom, facing the paper. Use a pencil to trace around the edges of the box onto the paper. Set the box aside. You should now have a rectangle outline on your paper.
Next, make a way line spanning the length of your rectangle. This wavy line defines the shape of your sleigh.

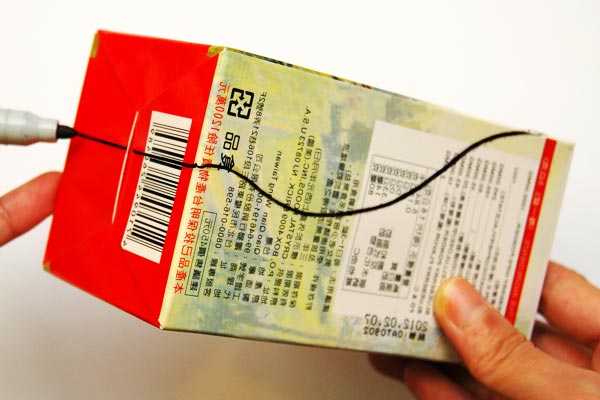
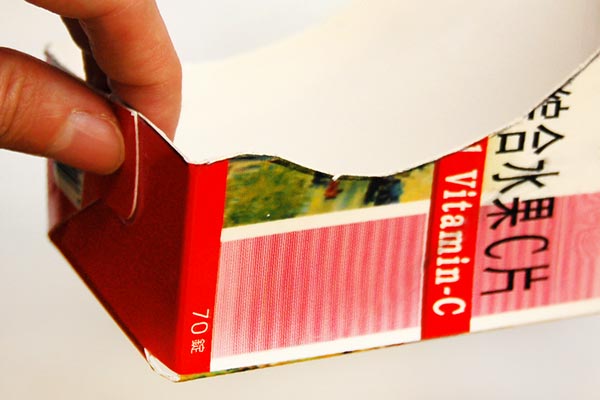
3Make a pair of sleigh outlines.
Cut out the sleigh pattern. Place the pattern on the box's largest panel, aligning its straight edges with those of the box.
Use a pencil or a marker to trace the outline of the pattern's wavy edge onto the box. Repeat on the opposite box panel.
4Draw a pair of straight lines.
On each of the box's small panels, draw a straight line connecting the ends of the two sleigh outlines.
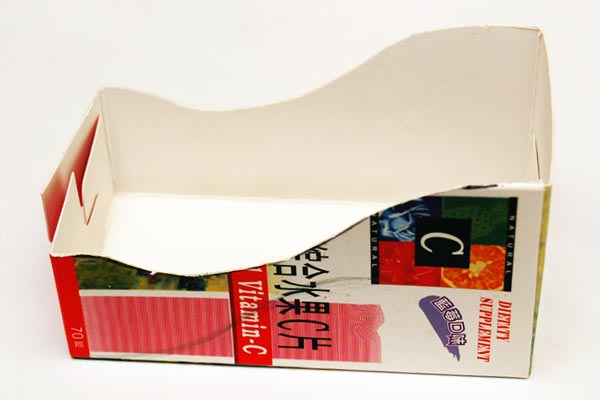
5Cut out the sleigh.
Cut the box along the sleigh outline.
6Glue the flaps.
Glue or staple any open flaps.
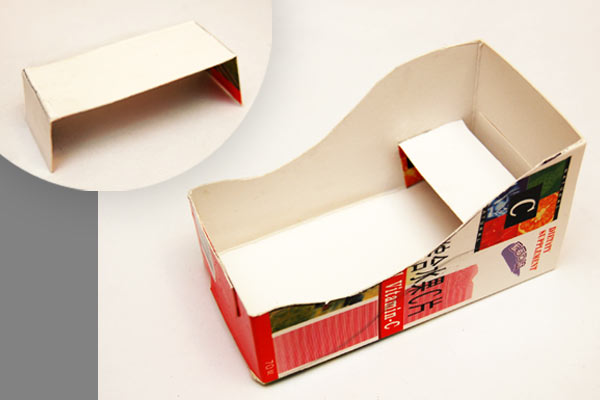
7Make a seat.
If you want to make a seat for your sleigh, cut out a strip of cardboard (use the box scraps from Step 5). Fold down both ends of the strip so that it fits inside the sleigh. Glue the seat in place.
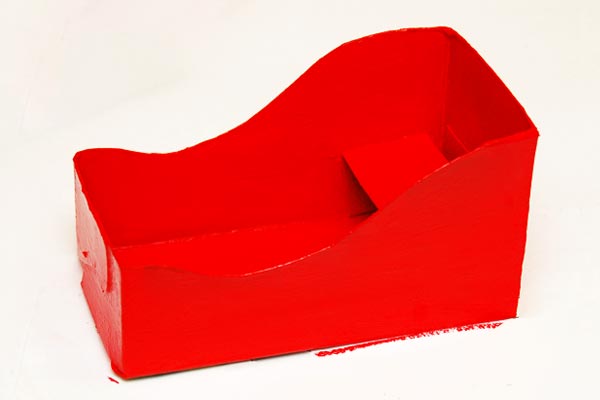
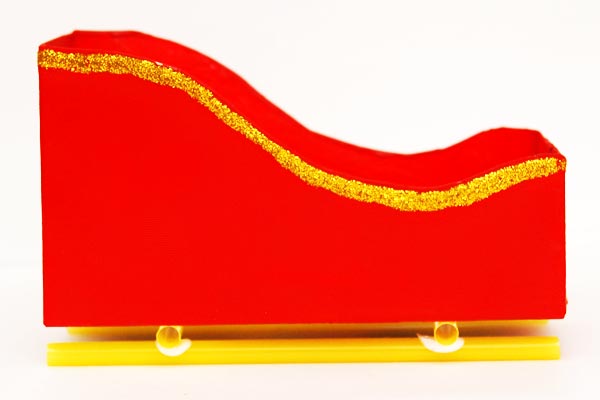
8Paint the sleigh.
Paint the sleigh with acrylic paint. You can paint it red or green for a Christmas color or paint it brown to make it look like a wooden sleigh.
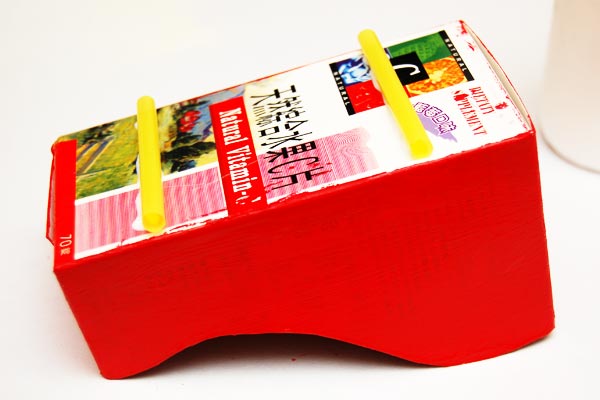
9Glue a pair of drinking straws.
Once the paint dries, turn the sleigh upside-down. Cut a pair of drinking straw pieces to the same width as your sleigh. Glue the pair at the bottom of the sleigh, one an inch from the front and the other an inch from the back.
For a quicker drying time, you can use a glue gun instead of white glue.
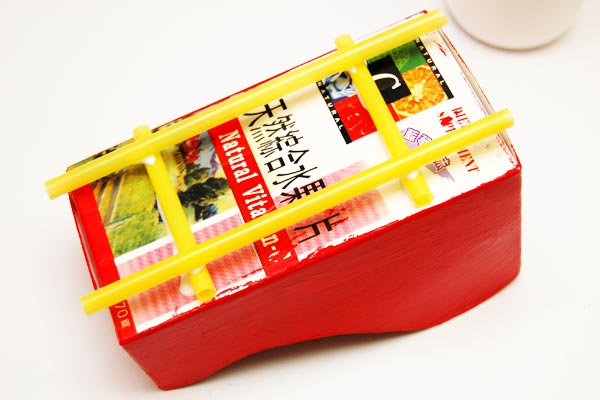
10Glue a 2nd pair of drinking straws.
Cut a pair of drinking straws to the same length as your sleigh. Position them perpendicular to the first pair of drinking straws and about ½" from the side edge of the sleigh. Glue them in place with white glue or with a glue gun.
11Decorate the sleigh.
When the glue dries, put your sleigh back in an upright position. You can decorate your sleigh further with stickers, glitter glue and other cute accents. You can even write "Merry Christmas" or "Happy Holidays" on it.
12Make some paper reindeer.
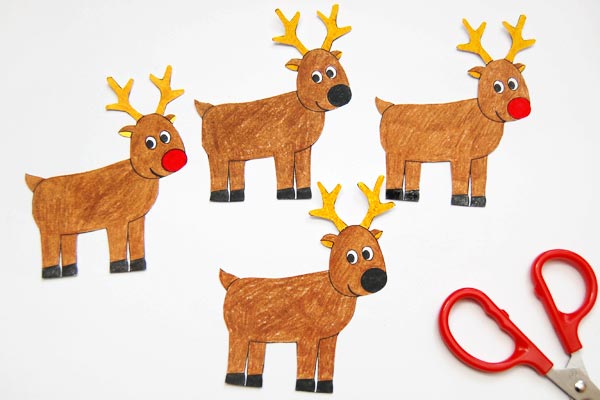
Draw four or more reindeer or print out any of these Christmas reindeer onto A4 or Letter size cardstock. Color and cut out the reindeer.
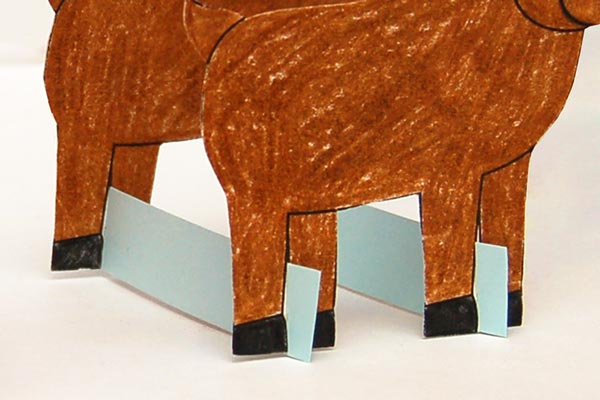
13Make paper stands.
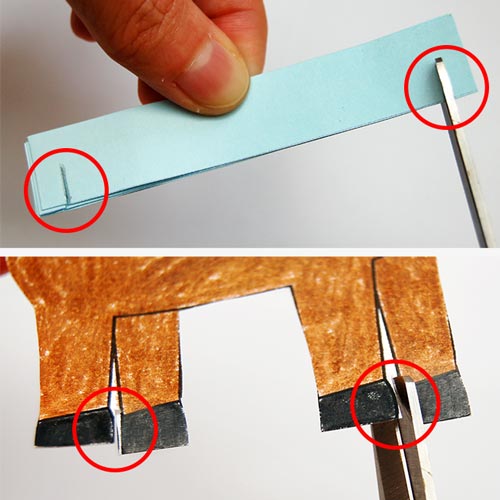
To make the reindeer stand upright, you will need to make paper stands for them. Cut out the same number of ½" wide strips of cardstock as the number of reindeer that you have. The length of a paper stand should be the same as, or slightly shorter than the sleigh's width.
Cut a pair of short slits close to the ends of each paper stand. Make a pair of short slits at the base of each paper reindeer as well. The locations of the slits are circled in red in both photos.
14Connect the reindeer by pairs.
Join the reindeer by pairs using two paper stands—one stand interlocking with the slits on both reindeer's front legs and the other stand interlocking with the slits on the hind legs.
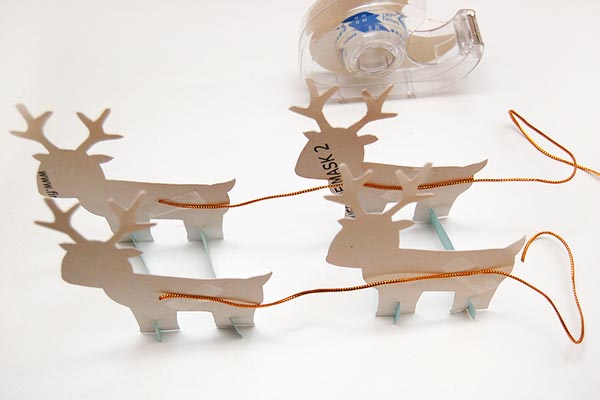
15Connect the reindeer with string.
Line up your reindeer pairs so that they form two columns. Cut a pair of long string. Connect each column of reindeer using a string. Tape the string from the back of one reindeer to the next.
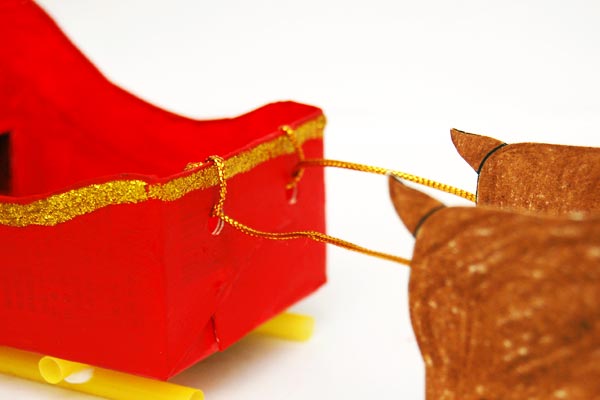
16Attach the reindeer to the sleigh.
Connect the reindeer to the sleigh either by:
- Taping the string - tape the end of each string onto the front of the sleigh.
- Tying the string around a hole - punch a pair of holes at the front of the sleigh. Connect the reindeer to the sleigh by fastening the ends of the strings around the holes.
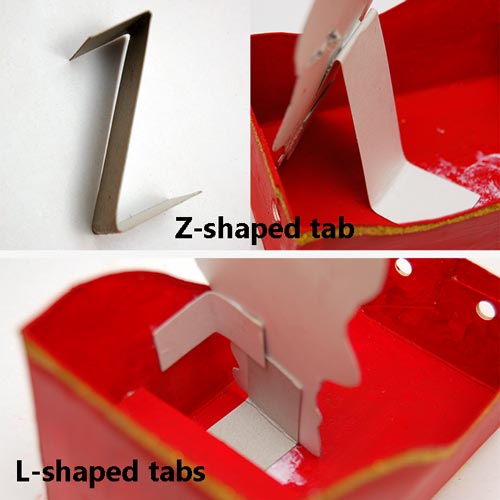
17Add a Santa Claus.
Draw a Santa Claus or print out any of these Santa Claus pages. Color, cut out and glue the paper Santa inside the sleigh.
Use a Z-shaped tab to prop up your Santa Claus from the back (top photo) or two L-shaped tabs to keep him in place (bottom photo).
You can also fold your Santa at the hips and knees then have him sit down on the sleigh's seat.
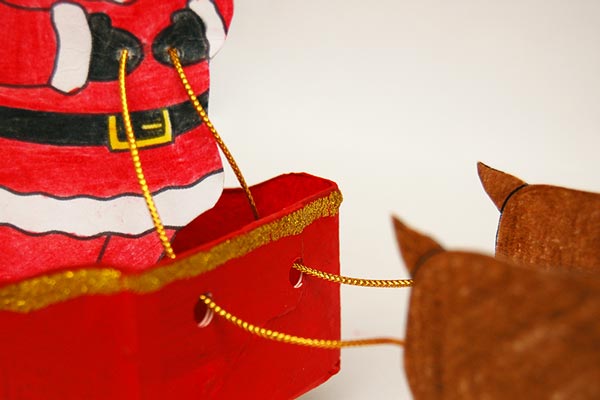
18Let Santa hold the reins.
You can connect the strings to your Santa Claus as if he is holding the reins. Use the point of a pencil to punch a pair of small holes on Santa's hands. Insert the ends of the strings through the holes. Make knots on the strings at the back of your Santa Claus.
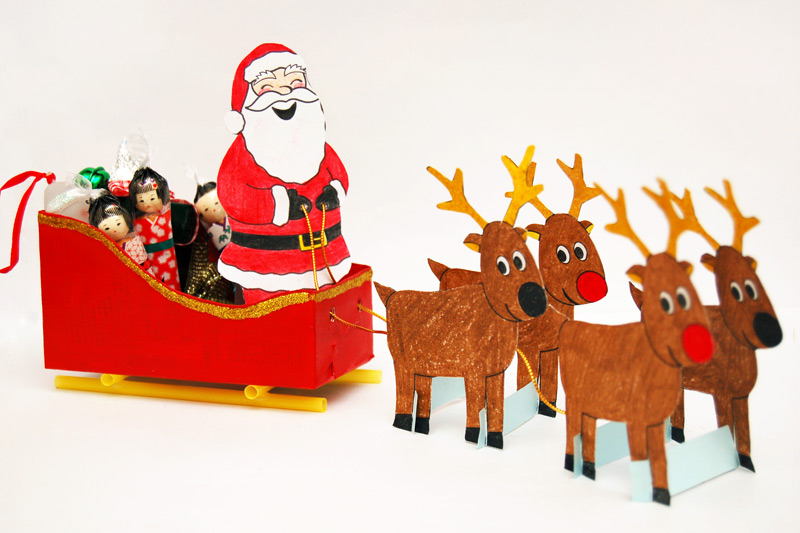
19Fill the sleigh.
Fill the sleigh with candy, small toys and pretend presents.
More Ideas
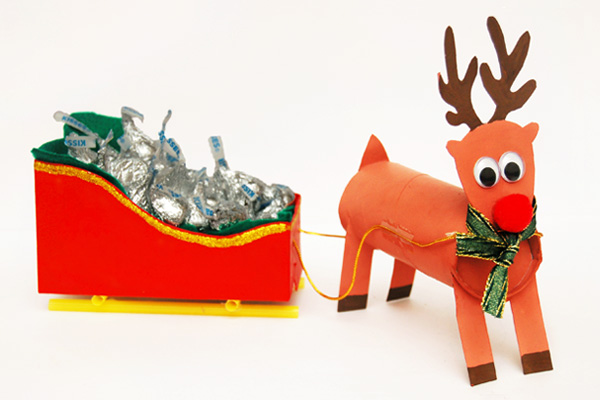
Make a TP roll reindeer.
You can also make this adorable TP Roll Reindeer to pull the sleigh.
Use your Santa sleigh as a cute Christmas treat holder. Fill it with small candy canes, chocolate and holiday treats.
You Might Also Like
Comments
Source: https://www.firstpalette.com/craft/santa-sleigh.html
Belum ada Komentar untuk "How to Make a Origami Sleigh"
Posting Komentar